Creating a Copilot
Hiring takes two steps: identity, then face and voice. Assignment and publishing happen on the copilot's page afterwards.
Step 1: Identity
Click New Copilot on the roster.
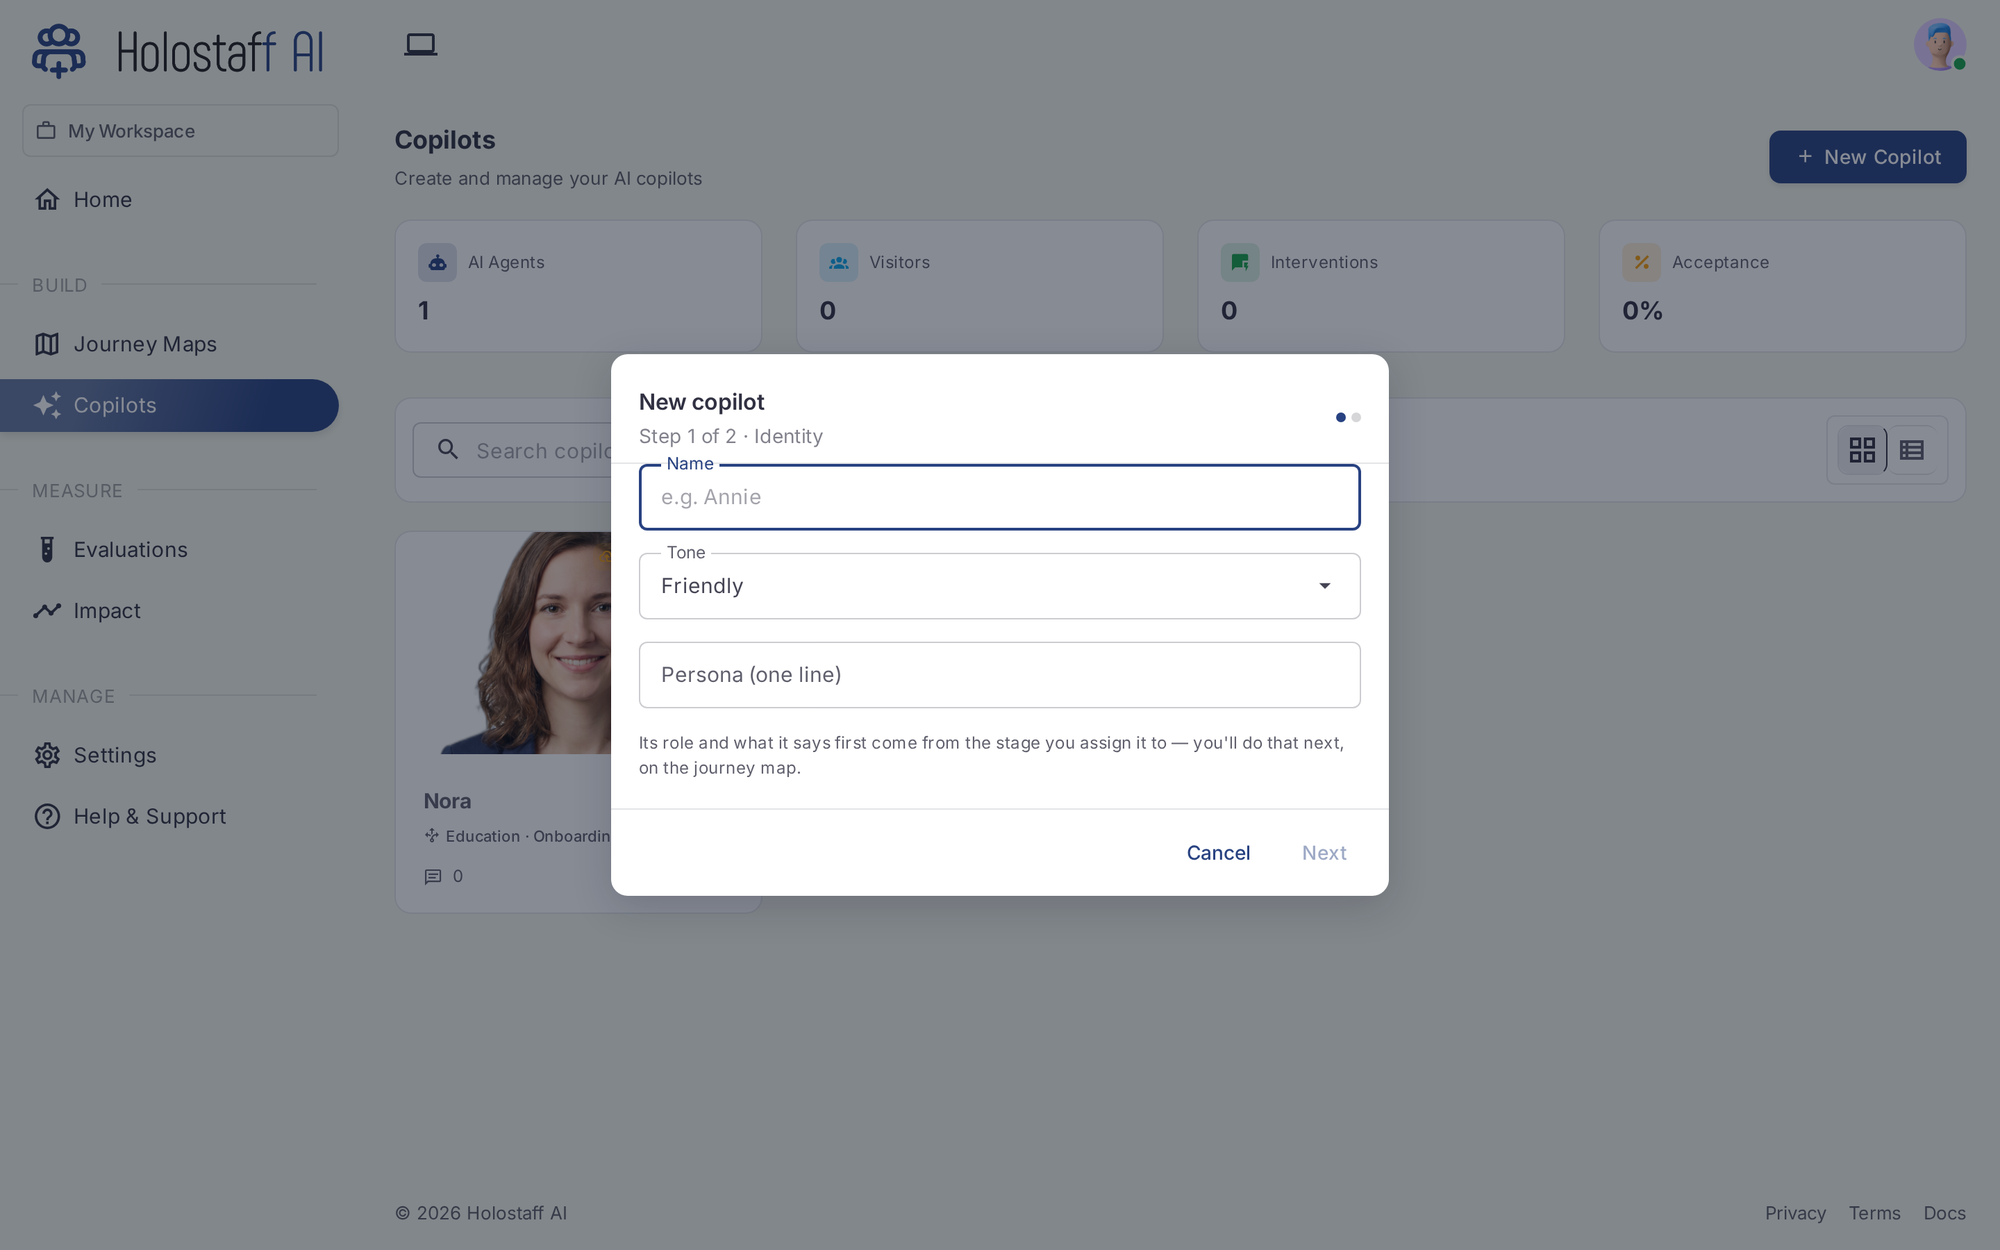
- Name. What users will see. Short first names work best.
- Tone. How it speaks: friendly, formal, concise.
- Persona. One line of "who is this": you'll see it again first thing on the stage, so make it true.
- Description. Optional depth: anything the copilot should know about how to do its job.
Step 2: Face and voice
Pick an avatar from the catalog. Each has a matched face and voice, in photorealistic, cartoon, 3D, and mascot styles. The avatar is the face your copilot wears in the live Stage: the on-screen presence users talk to.
Want your own? Custom avatars can be added to your workspace; contact support to enable them.
The copilot page
Every copilot has a page tracking its setup from designed to live:
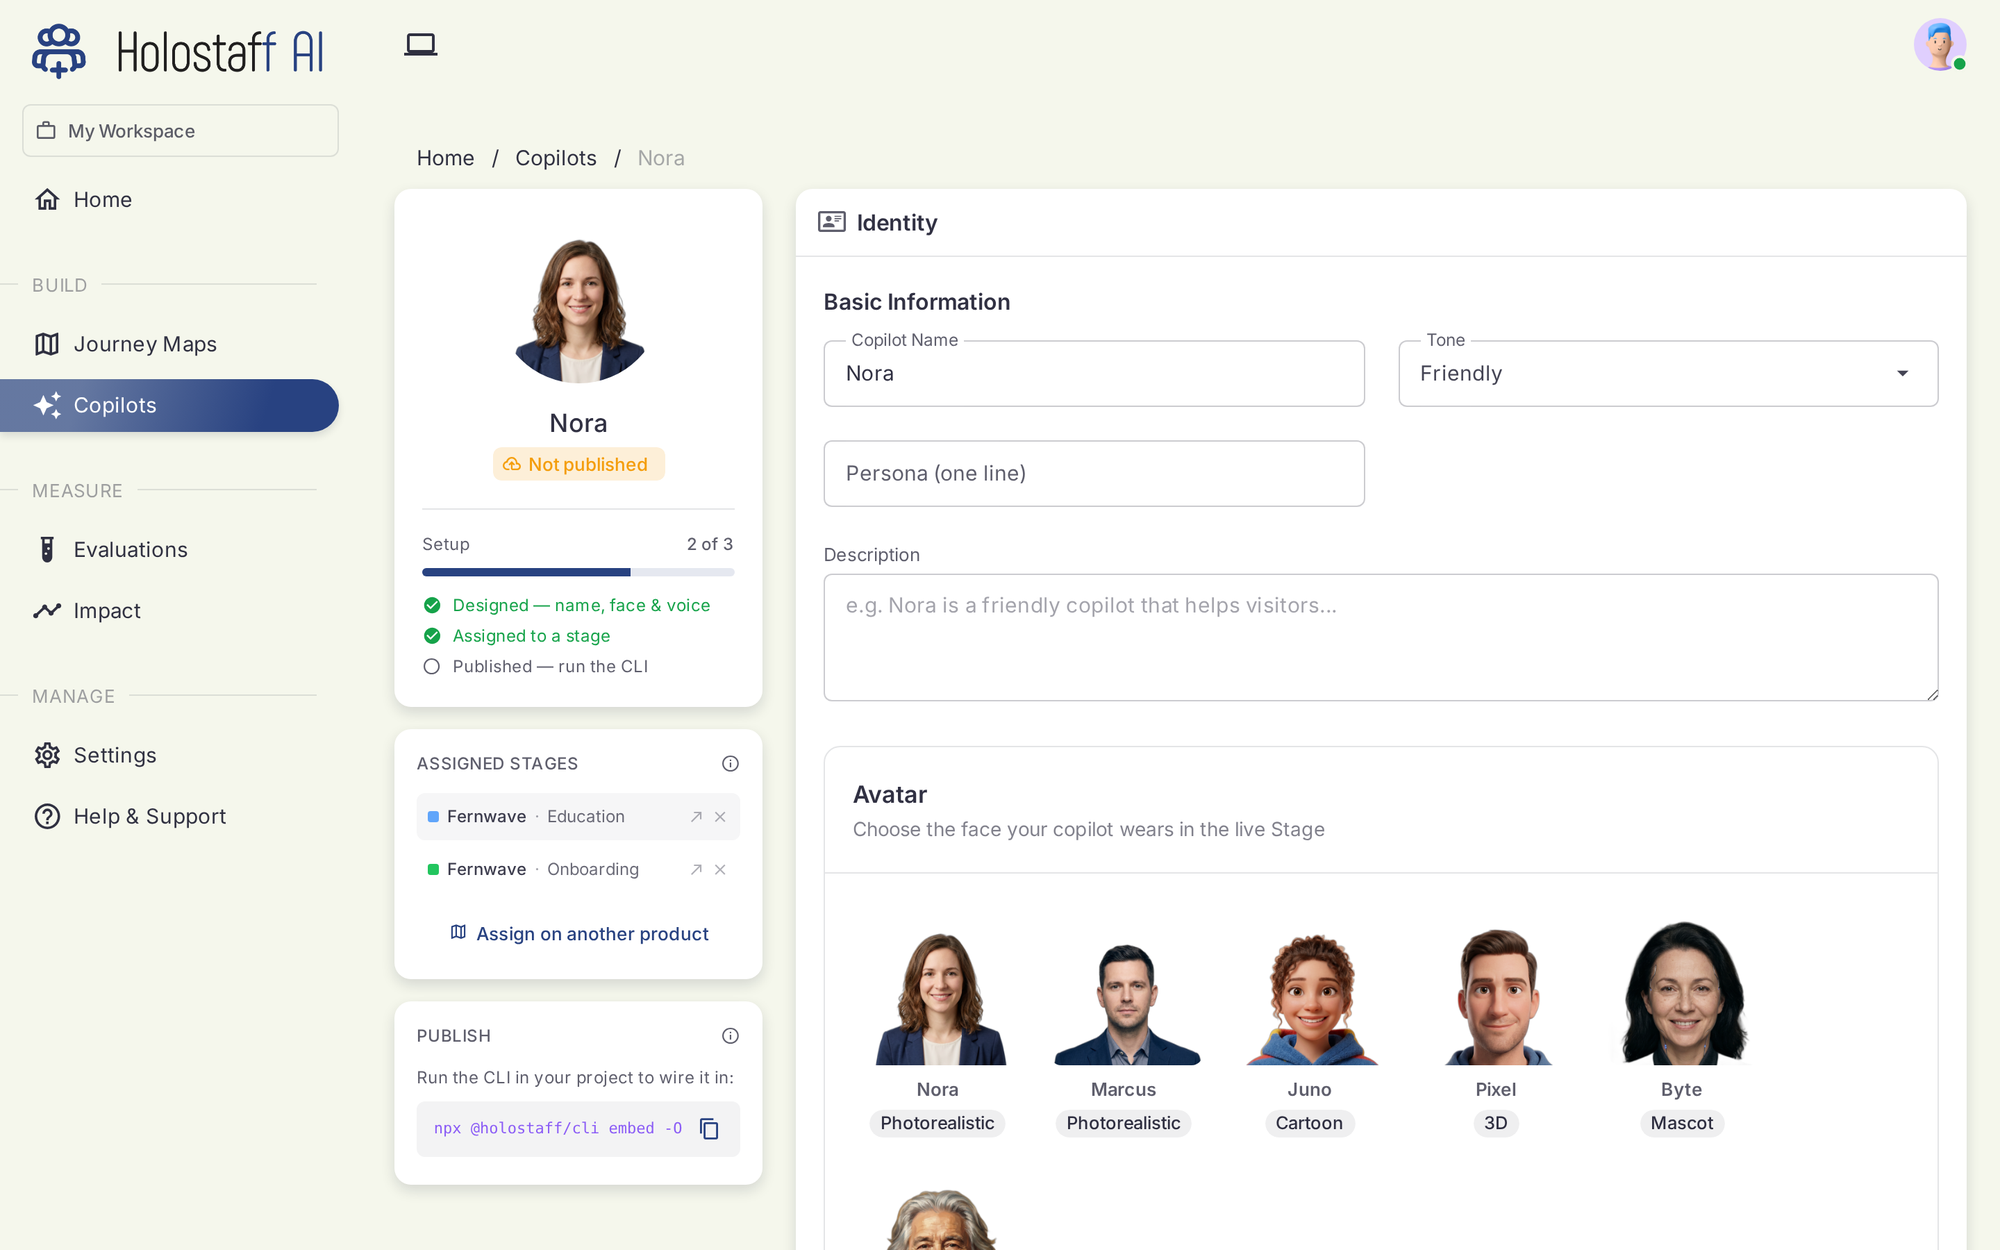
- Setup checklist. Designed → Assigned to a stage → Published.
- Assigned stages. The product and stage pairs this copilot owns. Assign from here or from the map's Journey view.
- Publish. Wiring the copilot into your product happens from your repo, not from the dashboard:
The CLI drafts the change, shows you the diff, and commits it to a branch. Shipping it to production goes through the deploy flow.
Assignment is not deployment
Assigning a copilot to a stage stages the work in your dashboard. Users only meet the copilot after the deploy PR merges and the copilot is published.