The Canvas
Open any product from Journey Maps and you land on its canvas. This is where the scan's output becomes something you can read, question, and staff.
The overview
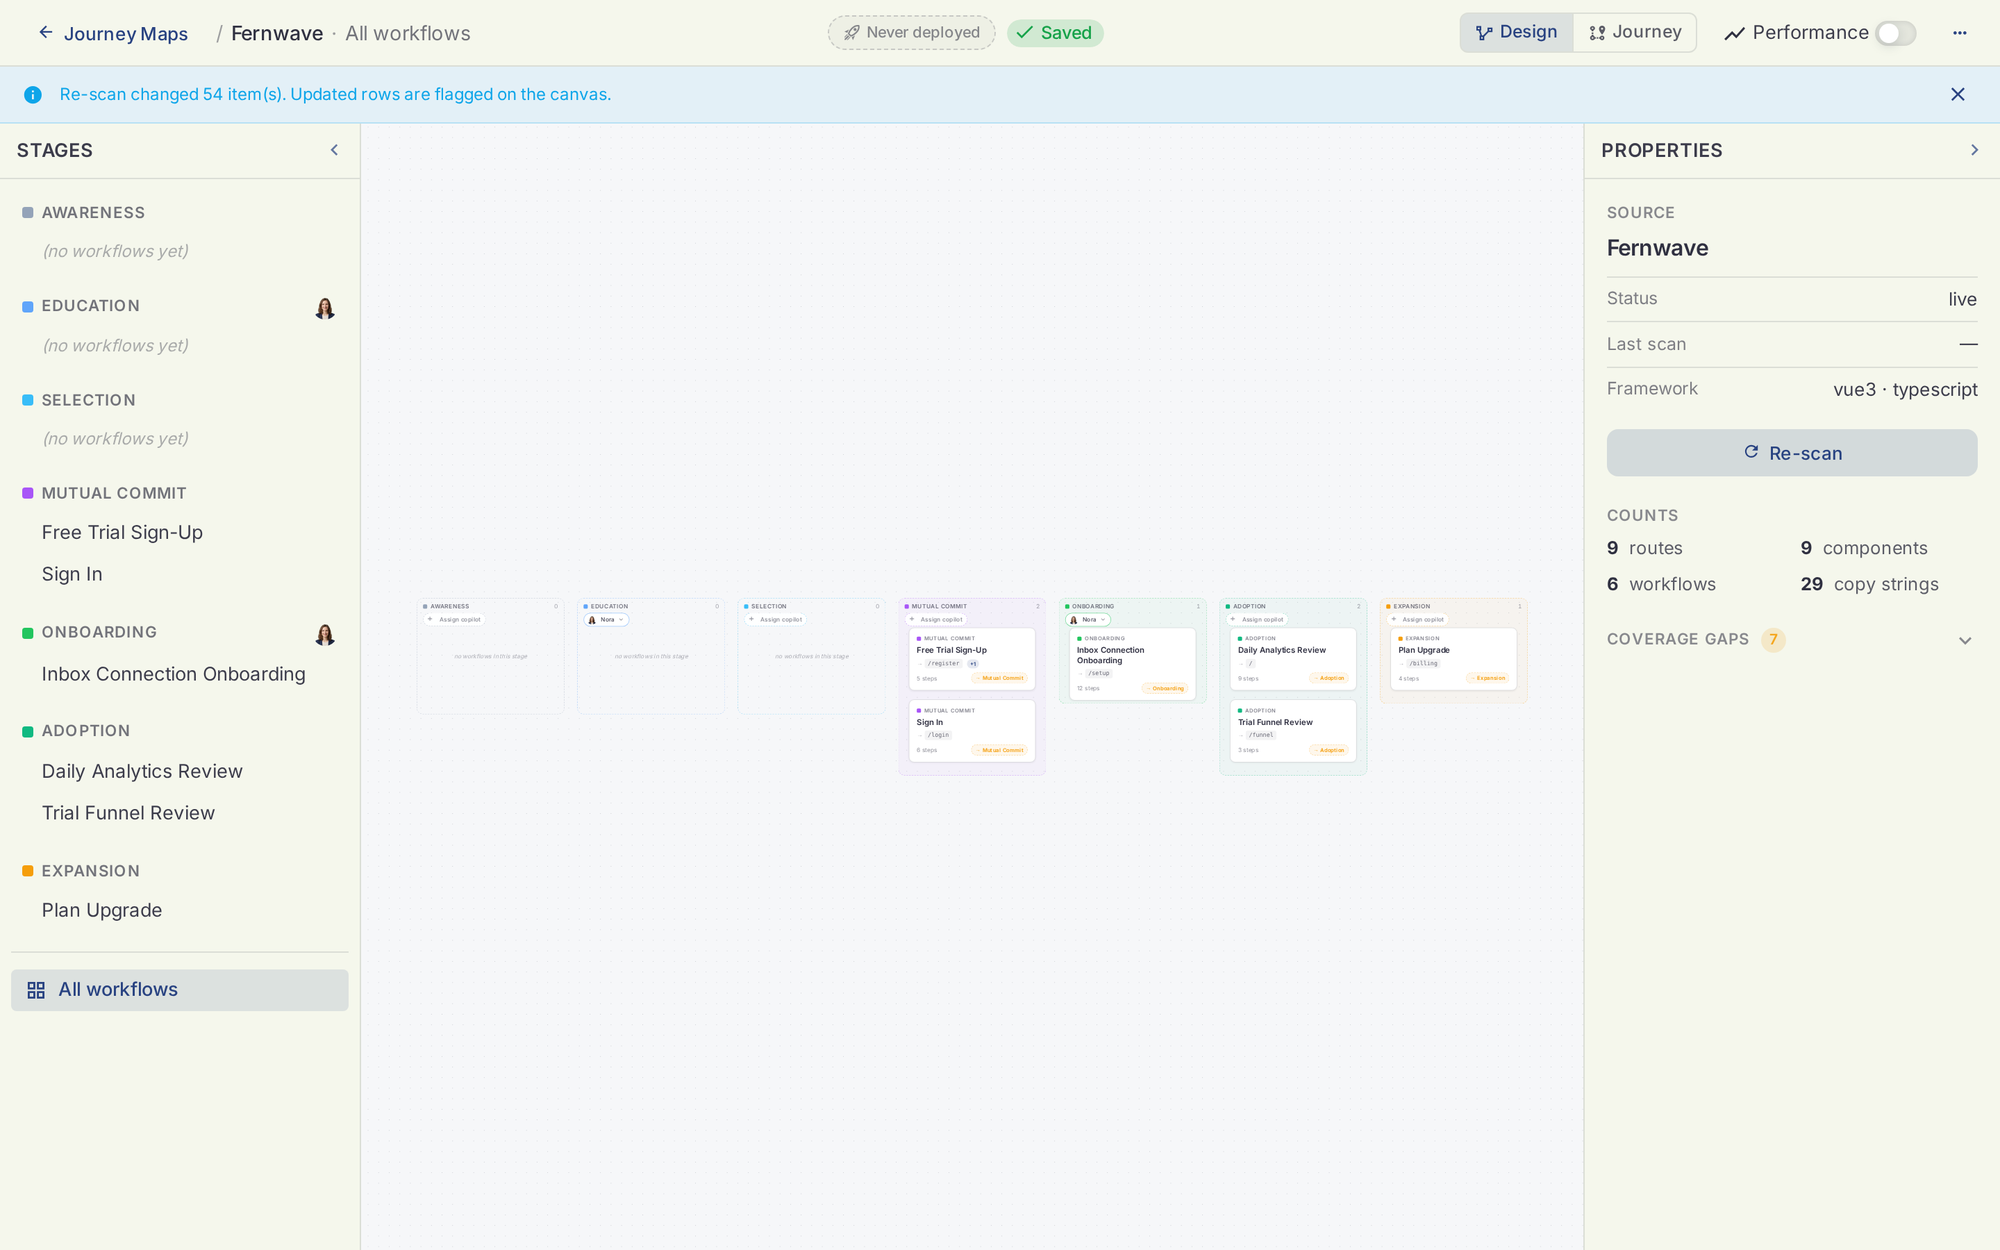
The default view shows all workflows laid out under their stages, with the stage rail on the left and the product's properties on the right: source status, framework, last scan, and the counts (routes, workflows, components, copy strings).
Inside a workflow
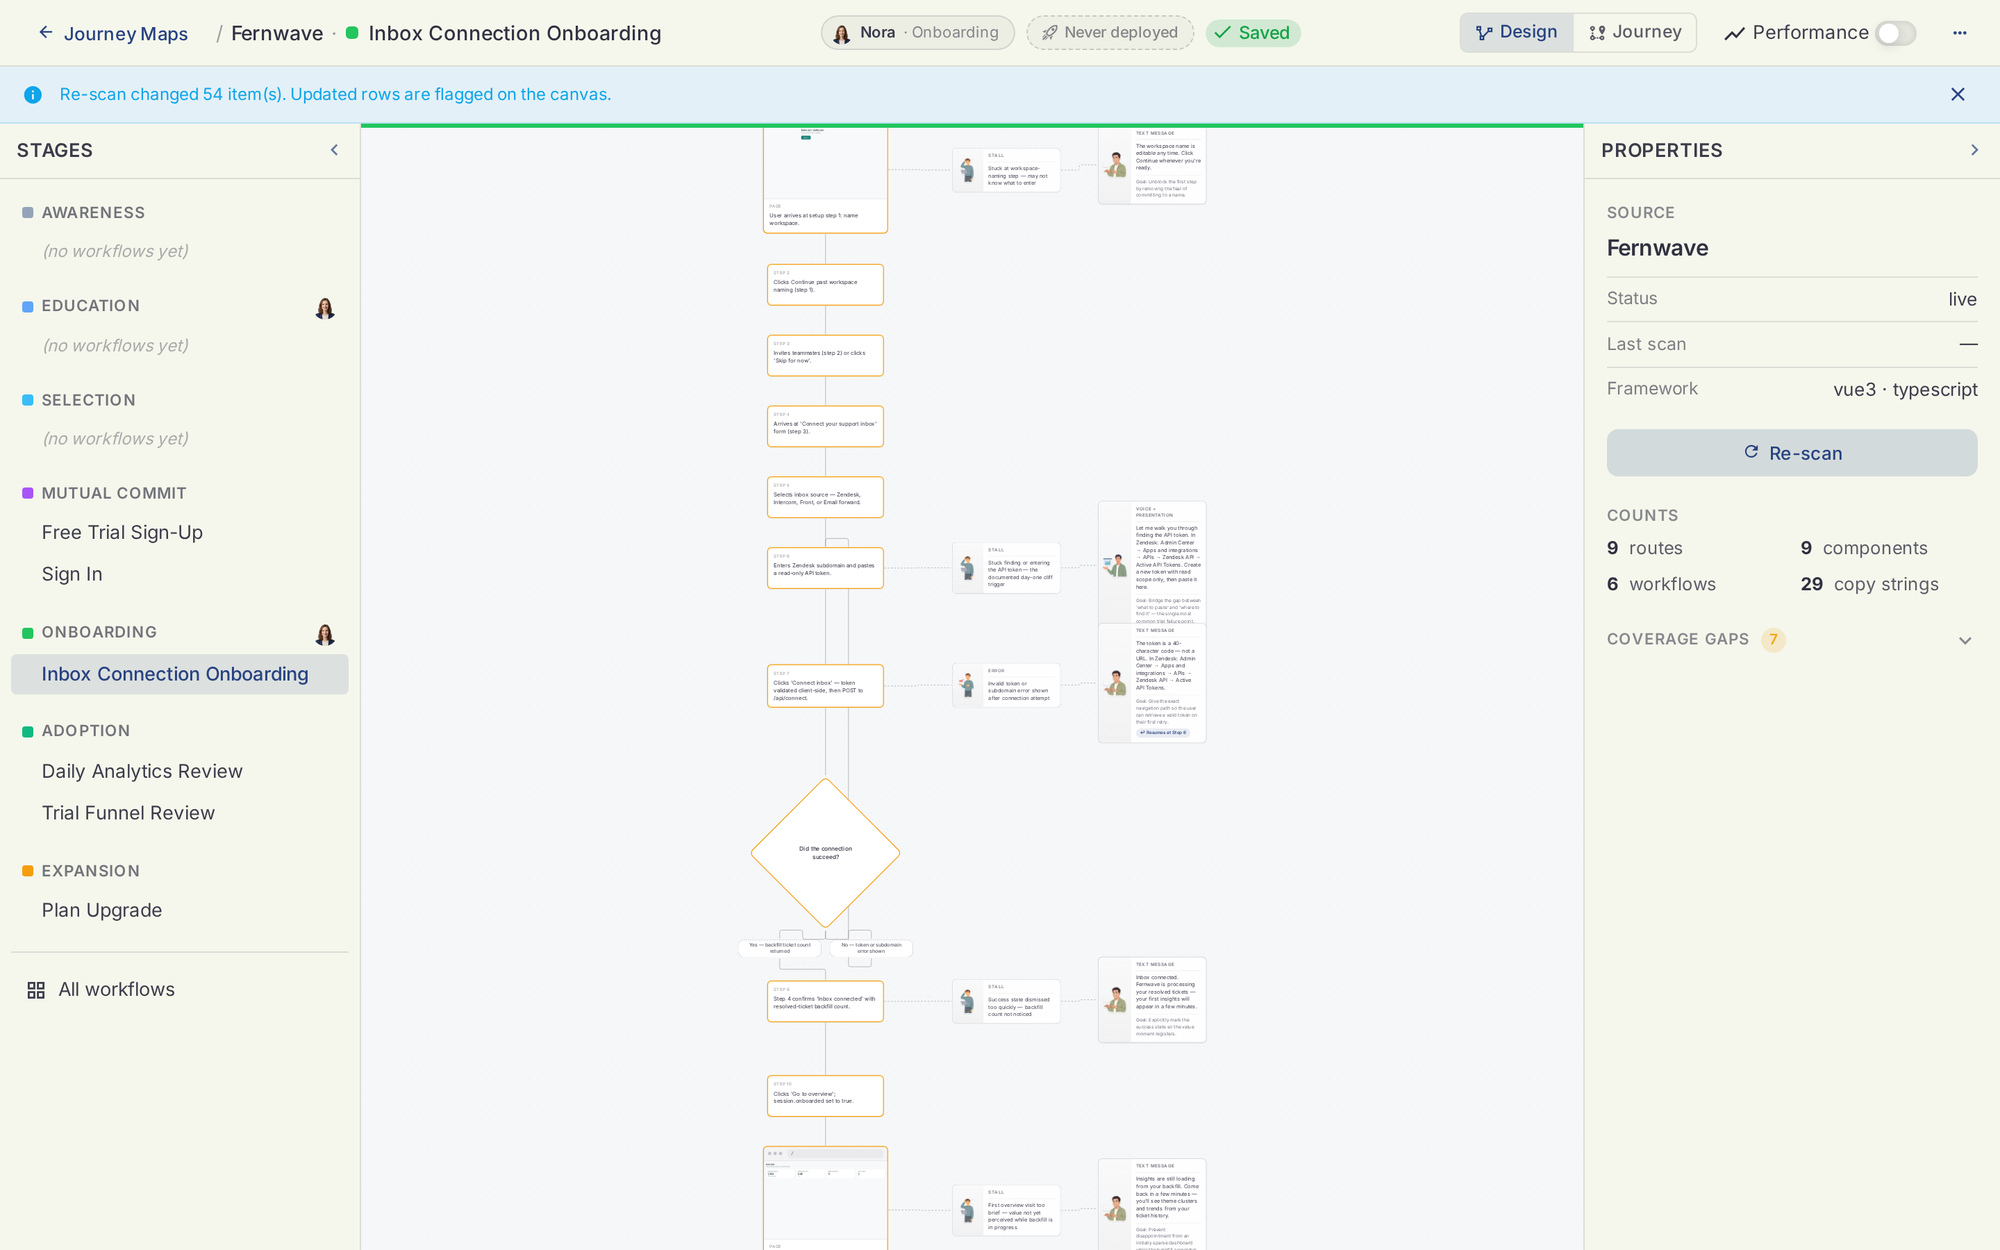
Click a workflow in the stage rail to open its flow. Each workflow is drawn as the user experiences it: steps, decisions, and the screens involved. Alongside the main path, the canvas shows the moments that matter:
- Risk moments — where this workflow loses users. Marked with the user sticker.
- Interventions — what a copilot would do at that moment. Marked with the copilot sticker.
- Page references — the actual screens, rendered from your code, so the flow stays grounded in the real product.
Design view and Journey view
The toggle in the top bar switches how you read the map:
- Design — the flowchart. Best for reviewing what the scan understood and where the risks are.
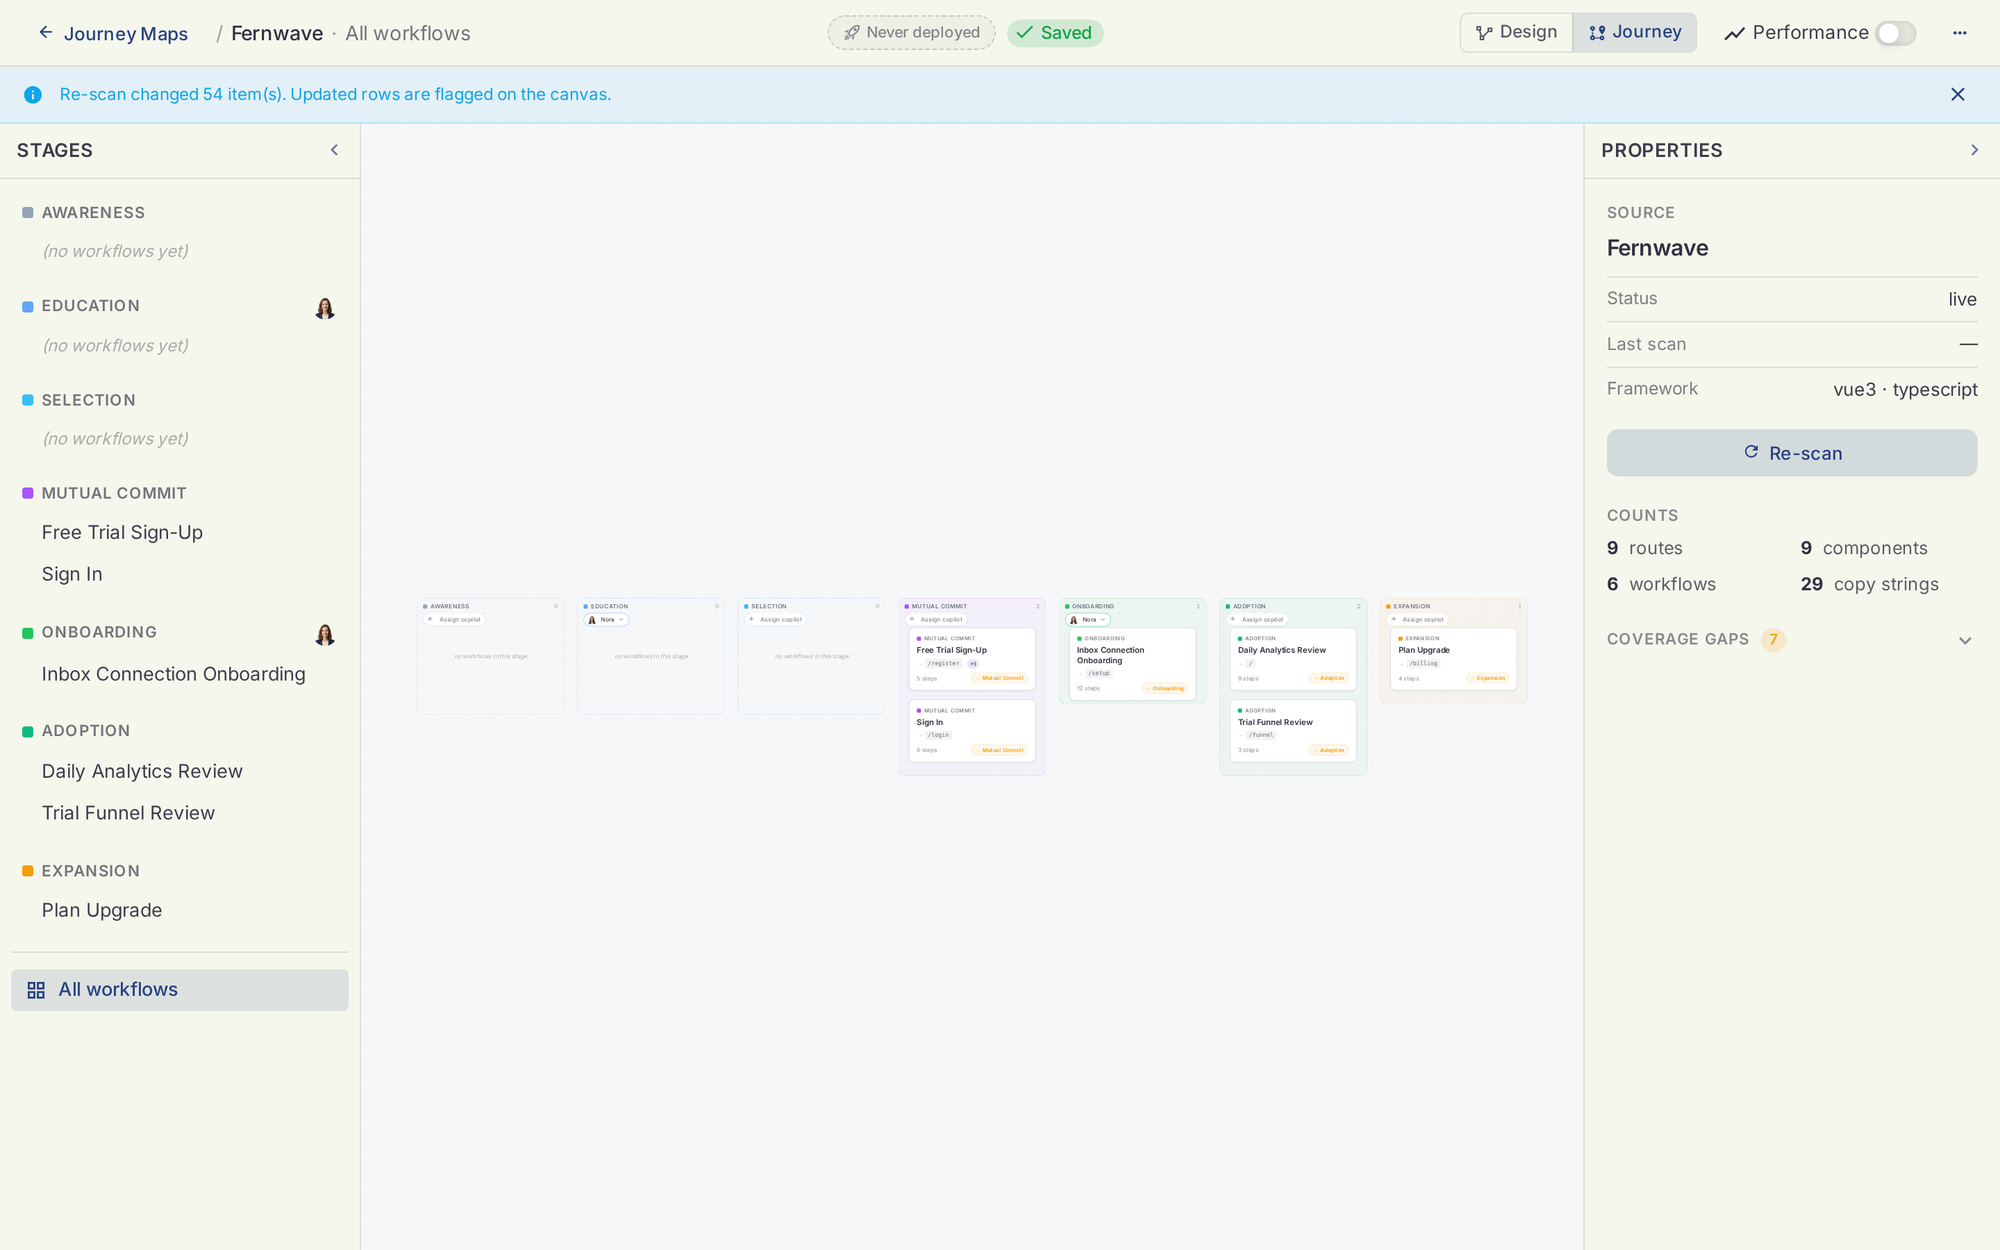
- Journey — the staffing board. The same workflows organized for action: which stage is covered, which copilot owns it, and an Assign copilot button where nobody does.
Coverage gaps
The properties panel counts coverage gaps: stages or risk moments with no workflow or no intervention proposed. Gaps are normal after a first scan. They are the to-do list for staffing your product.
Re-scanning
Code moved? Click Re-scan in the properties panel, or run /scan again from the repo. The map updates in place and changed rows are flagged on the canvas so you can review what moved. Re-scans version the artifact; nothing you assigned or published is lost.
Tip
Scans bind to the repo through .holostaff/source.json, so every re-scan lands on the same source. See the CLI reference.